The Guide to Developing a Python CLI Application with ChatGPT

When I began writing articles on Medium, I encountered a recurring issue: the need to analyze and find SEO-optimized titles, evaluate the strengths and weaknesses of an article, and check its technical correctness. Doing this manually for each article became tedious.
Problem
- Analyze and propose SEO-optimized titles for an article.
- Analyze and provide the strong and weak sides of an article
- Analyze and check the technical correctness of an article.
All three steps I did previously with ChatGPT, but it’s incredibly boring to write the same prompt every time when I write a new article.
Loading...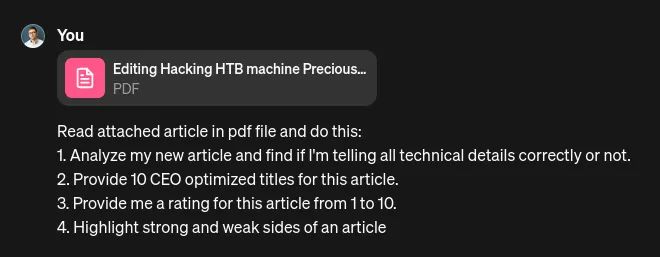
In this article, I will explain how to create a CLI application in Python that will automate these tasks, laying the groundwork for something even greater.
Result
As a result of this article, readers will be able to:
- To create a Python CLI application.
- Integrate ChatGPT into the software application.
- Build a Python project with Hatch.
- Publish this project on GitHub and add it to their portfolio.
Let’s begin! 😃
1. Installation
Let’s install Hatch from the Installation — Hatch page. After that, the command:
1hatch --help
should work.
Loading...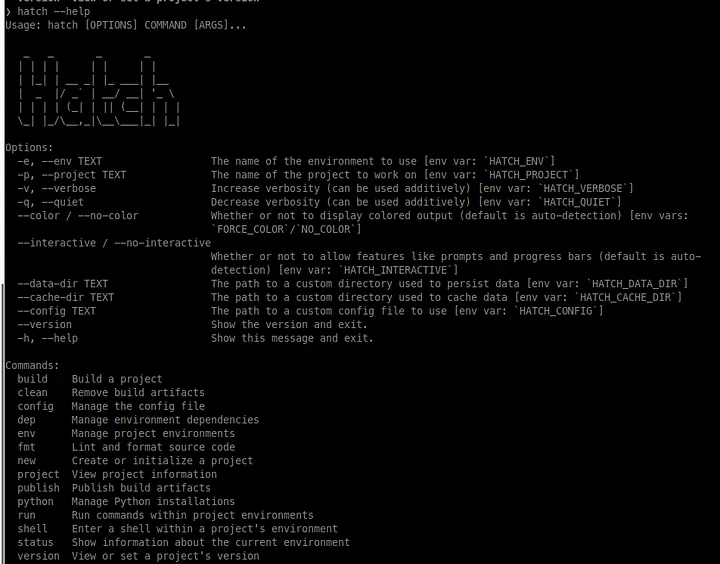
Hatch is a modern project management tool for Python, similar to Gradle or Maven for Java. In other words, with Hatch, we can specify how to build the project and which dependencies we need to install.
2. Create a new project
Let’s create a new project with Hatch by using this command:
1hatch new --cli article-improver
The new Python project should be created in the folder article-improver as shown in the screenshot below.
Loading...
Let’s open it in the VSCode or another IDE and inspect the project structure.
src— this folder contains our main source code, by default it contains thearticle_improvermodule where we will put our source code.tests— this folder contains unit tests.LICENSE.txt— software license, we will not use it in our tutorial, but let’s leave as is.README.md— this is a readme file that our users will use to get an idea of what our project does.pyproject.toml— this is a specification for Hatch with an explanation of how to build the project.
3. Create a new repository
Every project should have a version control system (VCS) because, without it, it’s very hard to do iterative development. So, before starting the development, let’s create a Git repository with the following commands:
cd article-improver— switch directory toarticle-improverin the terminal because git should be run fromarticle-improverfolder (or if you already opened this folder in the IDE, the terminal in the IDE will automatically open this folder).git init— initialize a new Git repository.
The result of a command execution is shown in the screenshot below.
Loading...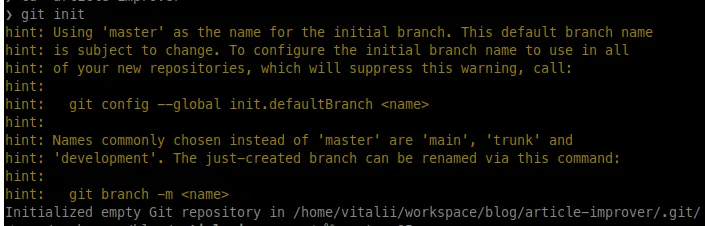
Let’s add a .gitignore file which will protect us from committing unwanted files, such as IDE configuration files or build results files. Copy the content of the .gitignore file below (you don’t need to write it by yourself; for all new projects, simply Google “Python .gitignore” or “Java .gitignore” — there are already prepared common .gitignore files for different languages):
1# Byte-compiled / optimized / DLL files
2__pycache__/
3*.py[cod]
4*$py.class
5
6# C extensions
7*.so
8
9# Distribution / packaging
10.Python
11build/
12develop-eggs/
13dist/
14downloads/
15eggs/
16.eggs/
17lib/
18lib64/
19parts/
20sdist/
21var/
22wheels/
23share/python-wheels/
24*.egg-info/
25.installed.cfg
26*.egg
27MANIFEST
28
29# PyInstaller
30#  Usually these files are written by a python script from a template
31#  before PyInstaller builds the exe, so as to inject date/other infos into it.
32*.manifest
33*.spec
34
35# Installer logs
36pip-log.txt
37pip-delete-this-directory.txt
38
39# Unit test / coverage reports
40htmlcov/
41.tox/
42.nox/
43.coverage
44.coverage.*
45.cache
46nosetests.xml
47coverage.xml
48*.cover
49*.py,cover
50.hypothesis/
51.pytest_cache/
52cover/
53
54# Translations
55*.mo
56*.pot
57
58# Django stuff:
59*.log
60local_settings.py
61db.sqlite3
62db.sqlite3-journal
63
64# Flask stuff:
65instance/
66.webassets-cache
67
68# Scrapy stuff:
69.scrapy
70
71# Sphinx documentation
72docs/_build/
73
74# PyBuilder
75.pybuilder/
76target/
77
78# Jupyter Notebook
79.ipynb_checkpoints
80
81# IPython
82profile_default/
83ipython_config.py
84
85# pyenv
86#   For a library or package, you might want to ignore these files since the code is
87#   intended to run in multiple environments; otherwise, check them in:
88# .python-version
89
90# pipenv
91#   According to pypa/pipenv#598, it is recommended to include Pipfile.lock in version control.
92#   However, in case of collaboration, if having platform-specific dependencies or dependencies
93#   having no cross-platform support, pipenv may install dependencies that don't work, or not
94#   install all needed dependencies.
95#Pipfile.lock
96
97# poetry
98#   Similar to Pipfile.lock, it is generally recommended to include poetry.lock in version control.
99#   This is especially recommended for binary packages to ensure reproducibility, and is more
100#   commonly ignored for libraries.
101#   https://python-poetry.org/docs/basic-usage/#commit-your-poetrylock-file-to-version-control
102#poetry.lock
103
104# pdm
105#   Similar to Pipfile.lock, it is generally recommended to include pdm.lock in version control.
106#pdm.lock
107#   pdm stores project-wide configurations in .pdm.toml, but it is recommended to not include it
108#   in version control.
109#   https://pdm.fming.dev/#use-with-ide
110.pdm.toml
111
112# PEP 582; used by e.g. github.com/David-OConnor/pyflow and github.com/pdm-project/pdm
113__pypackages__/
114
115# Celery stuff
116celerybeat-schedule
117celerybeat.pid
118
119# SageMath parsed files
120*.sage.py
121
122# Environments
123.env
124.venv
125env/
126venv/
127ENV/
128env.bak/
129venv.bak/
130package/
131# Spyder project settings
132.spyderproject
133.spyproject
134
135# Rope project settings
136.ropeproject
137
138# mkdocs documentation
139/site
140
141# mypy
142.mypy_cache/
143.dmypy.json
144dmypy.json
145
146# Pyre type checker
147.pyre/
148
149# pytype static type analyzer
150.pytype/
151
152# Cython debug symbols
153cython_debug/
154
155# PyCharm
156#  JetBrains specific template is maintained in a separate JetBrains.gitignore that can
157#  be found at https://github.com/github/gitignore/blob/main/Global/JetBrains.gitignore
158#  and can be added to the global gitignore or merged into this file.  For a more nuclear
159#  option (not recommended) you can uncomment the following to ignore the entire idea folder.
160#.idea/
and paste this content into the .gitignore file in the root of the project article-improver as shown in the screenshot below.
Loading...
Let’s make the first commit with the following commands:
git add .— add all files to the Git.git commit -m "Init commit"— commit added files from step 1.
The result of executing these commands is shown in the screenshot below.
Loading...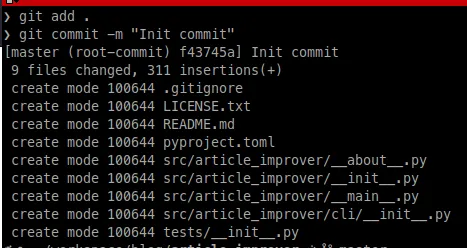
Publish on GitHub
This step is optional, but I would like to recommend publishing all your study projects on GitHub to show that you are studying for recruiters, which may help you in the future.
- Go to your GitHub profile
Loading...

- Click on the
Repositoriesbutton. Loading...
- Click on the
Newbutton. Loading...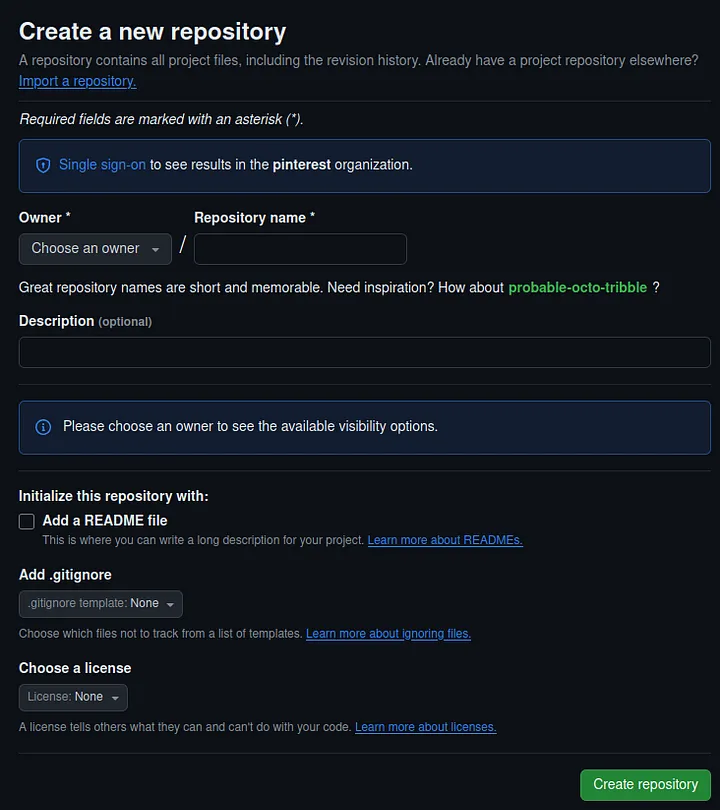
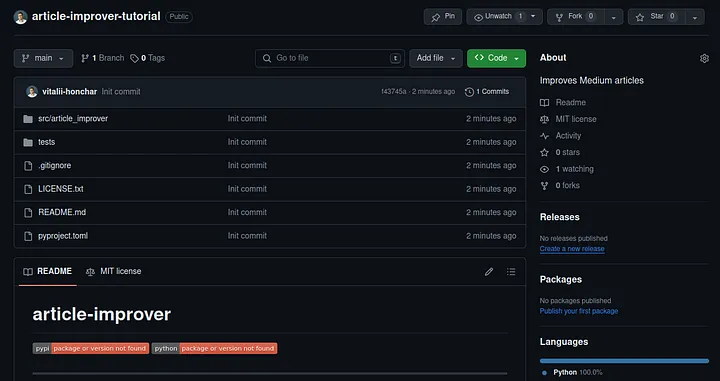
- Let’s specify information about our new repository
Owner— choose yourself or, if you are not in any organization, you will be chosen by default.Repository name—article-improver. I set the namearticle-improver-tutorialbecause for me this is a tutorial repository.Description—Improves Medium articles.- Other options are to be left unchanged.
The form should look like the screenshot below:
Loading...

- Click on the
Create repositorybutton
After this step repository should be created and you should see this:
Loading...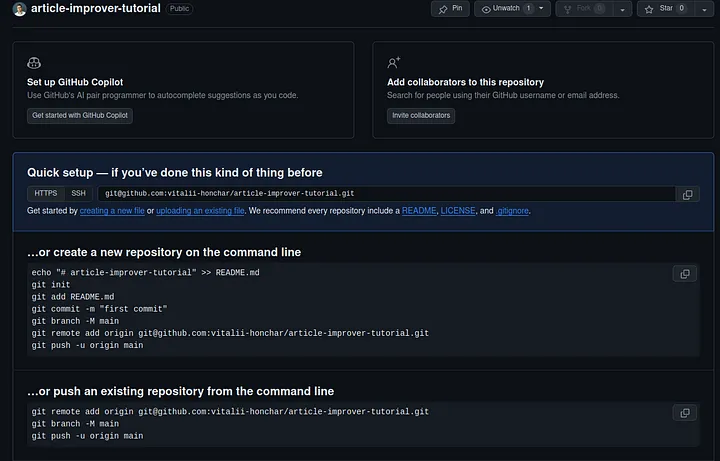
- Publish local commits to the GitHub repository
Make sure that theSSH button was chosen in the Quick setup section.
Loading...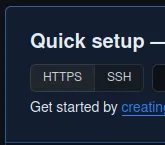
Next, let’s copy all commands from the section “or push an existing repository from the command line.” (Your commands will be slightly different because you have another GitHub name, so copy from your page).
Loading...
Let’s execute the copied commands in the terminal (the folder is still article-improver where we created the Git repository):
Loading...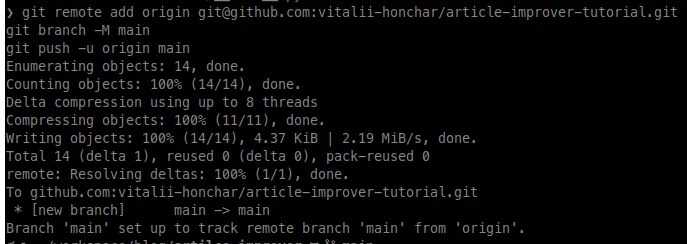
- Let’s check that it works by just refreshing the GitHub repository page
Loading...
Only for this first time do you have to use such big commands to publish local commits. Next time, to publish local commits, you will just use:
1git push origin <branch_name>
Changes from this section are now available on GitHub.
Awesome — all preparation steps have been completed. Let’s dive into the programming! 😎
4. Update Dependencies
Let’s open pyproject.toml in the IDE and edit the dependencies section:
Loading...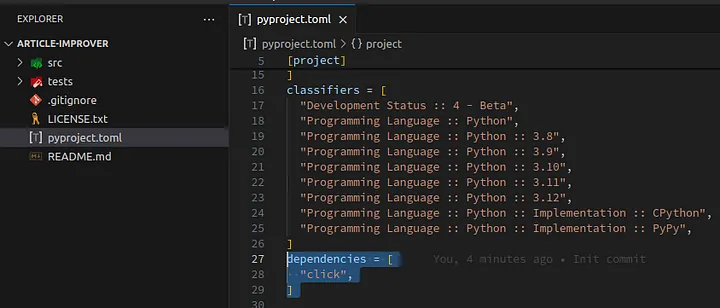
Replace dependencies with:
1dependencies = [
2  "openai",
3  "loguru",
4  "tiktoken",
5  "typer",
6  "pymupdf",
7  "pyyaml",
8  "rich"
9]
It should look like in the screenshot below:
Loading...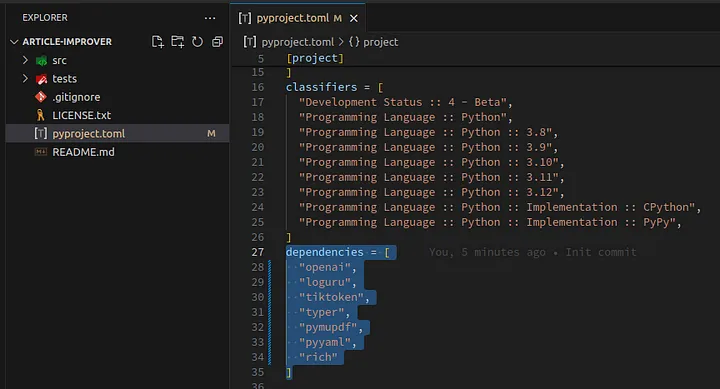
These changes are now available on GitHub.
5. Update Scripts
As we are developing a CLI application, we need to specify project.scripts to have the possibility to run our application like echo or ls without adding python before the script name. Let’s edit project.scripts.
Loading...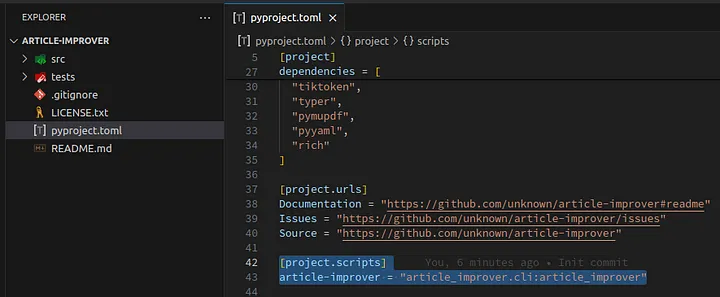
Let’s replace project.scripts with this content:
1[project.scripts]
2article-improver = "article_improver.main:app"
The result is shown in the screenshot below:
Loading...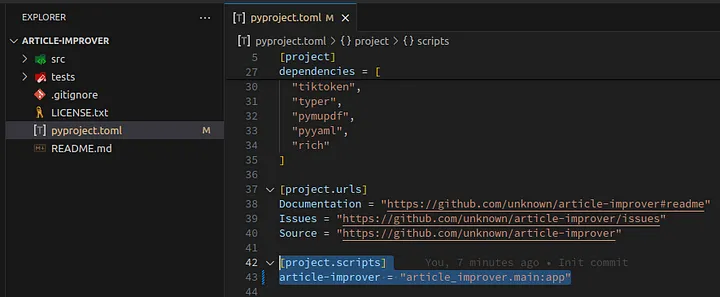
These changes are now available on GitHub.
6. First CLI Program
Let’s add a working CLI program.
-
Delete the folder
src/article_improver/clibecause we will not use it. Loading...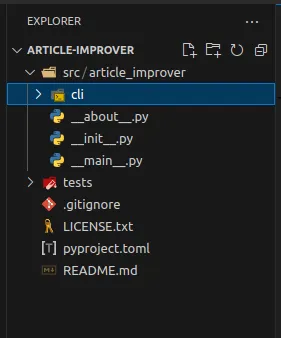 The project should look like the screenshot below:
Loading...
The project should look like the screenshot below:
Loading...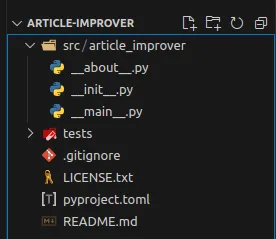
-
Delete a file
__main__.pyLoading...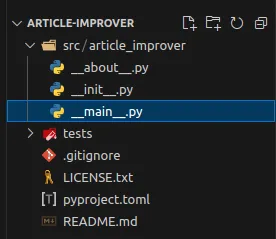
The project should look like the screenshot below:
Loading...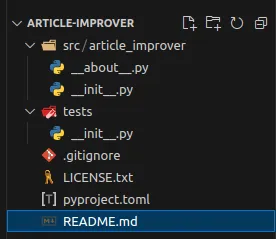
-
Create
main.pyin the packagearticle_improverLoading...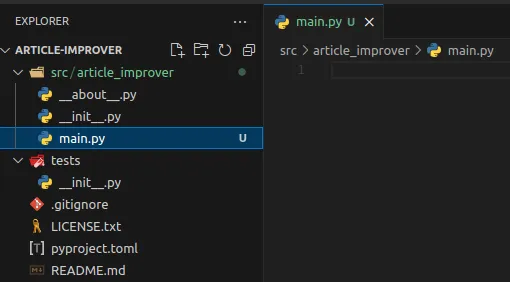
-
Create the first CLI application in the
main.py
Copy and paste this content into the main.py:
1import typer
2
3app = typer.Typer()
4
5
6@app.command(name="seo")
7def seo_command():
8    print("Seo command")
9
10if __name__ == "__main__":
11    app()
import typer— imports Typer library to work with user arguments. We can do it by ourselves, but Typer is the more handy way to do it.app = typer.Typer()— create a new instance of Typer, we will useappto mark functions which should be executed from user input.@app.command(name="seo")— marks a functionseo_commandas an executable function when the user passes a command line argumentseo.
It should look like:
Loading...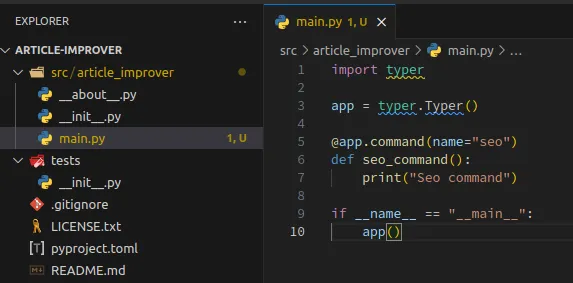
- Let’s launch our first command
seo
Open the terminal and execute:
1hatch run article-improver
or
1hatch run article-improver seo
Both commands will work because we have only one declared function to execute seo_command. When we have more than one function, we need to explicitly pass an argument to choose the right function — seo.
The result of the command execution is here:
Loading...
These changes are now available on GitHub.
7. Reading the PDF File
Since an article can be quite large, we will read it from a PDF file which our user will pass as an argument to the program (the browser can print a Medium article to PDF by pressing <Ctrl + P>).
Create the file pdf.py in the module article_improver as shown in the screenshot below.
Loading...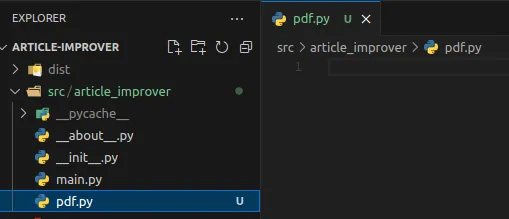
Copy and paste this content:
1import fitz
2
3
4def read_pdf(filename: str) -> str:
5    with fitz.open(filename) as doc:
6        text = ""
7        for page in doc:
8            text += page.get_text()
9        return text.strip()
Here we are reading the PDF file passed as an argument filename and collecting all its content in the string variable text. To do this, we need to import the module fitz, which should be included in our project from the added dependencies in pyproject.toml in the previous steps.
The file should look like this:
Loading...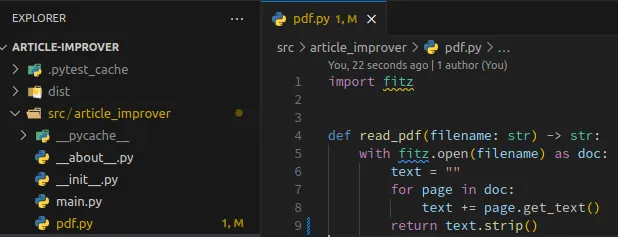
This code is now available on GitHub.
8. Test Reading the PDF file
In the previous step, we added pdf.py but haven’t used it yet, so we don’t know if it works. This is a common situation in software development — when you add a component but aren’t sure if it works yet. To mitigate this, we need to add tests for theread_pdf function. Tests also need to automatically check that our project works — this is their main purpose.
Let’s create a file test_pdf.py in tests package as shown in the screenshot below.
Loading...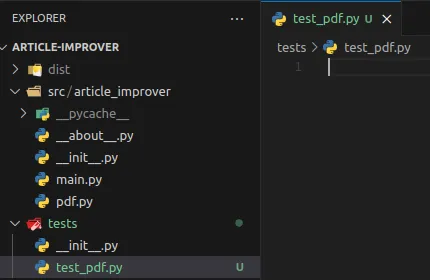
Download thetest.pdf file from the GitHub and save it in the tests package.
Loading...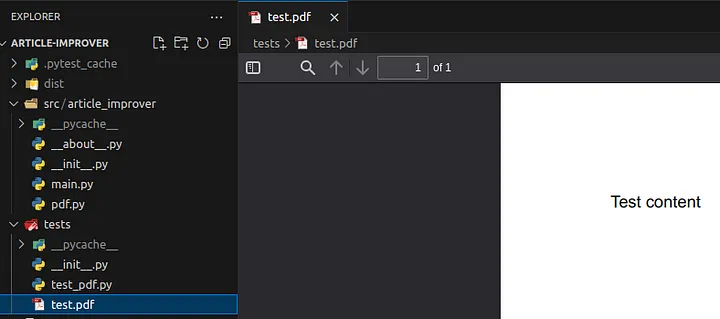
Next, copy and paste this content into test_pdf.py:
1from article_improver import pdf
2from uuid import uuid4
3import pytest
4import fitz
5
6
7def test_return_text_if_file_reading_was_successful():
8    # GIVEN
9    filename = "tests/test.pdf"
10    expected = "Test content"
11
12    # WHEN
13    actual = pdf.read_pdf(filename)
14
15    # THEN
16    assert actual == expected
17
18def test_raise_exception_if_file_not_exists():
19    # GIVEN
20    filename = str(uuid4())
21
22    # WHEN-THEN
23    with pytest.raises(fitz.FileNotFoundError):
24        pdf.read_pdf(filename)
25
test_return_text_if_file_reading_was_successful— this function tests if we can successfully read a file. The pattern for naming a test function isreturn_<expected_result>_if_<condition>. This pattern improves test readability and the future support of the project.test_raise_exception_if_file_not_exists— this function tests if the correct error will be raised in case the file does not exist.- The test uses another pattern
GIVEN/WHEN/THEN— these are comments for different test stages which indicate the stage to init data —GIVEN; the stage to execute tested action —WHEN; the stage to check for an expected result —THEN. - Also, I used
uuid4to generate a random string. This is necessary becauseuuid4has pretty good values distribution and the collision chance is pretty small. For larger projects with many tests, this is very useful because it reduces the number of flaky tests.
The test file should look like this:
Loading...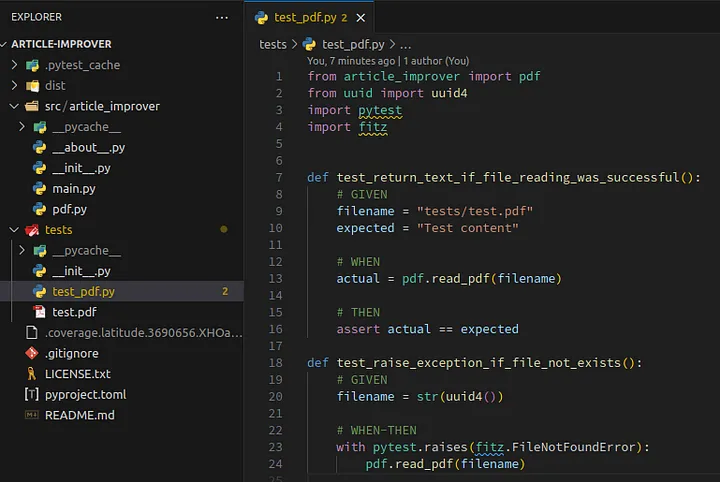
Let’s launch our tests with the command:
1hatch run test
All tests passed, as shown in the screenshot below:
Loading...
The content of this section is available on GitHub.
9. Adding Configuration Reader
Before we can add ChatGPT support, we need to have the ability to read the OpenAI token. So, let’s first add a configuration reader.
Create a file named config.py in the package article_improver:
1import asyncio
2import sys
3import yaml
4from dataclasses import dataclass
5from loguru import logger
6import os
7
8DEFAULT_CONFIG_FILE_FOLDER = f"{os.path.expanduser('~')}/.config/articleimprover"
9DEFAULT_CONFIG_FILE = "config.yaml"
10
11FIELD_OPEN_AI_KEY = "open_ai_key"
12
13
14@dataclass
15class Config:
16    open_ai_key: str
17
18
19def _read_config(config_file_folder: str, config_file: str) -> Config:
20
21    if config_file_folder is None or config_file is None:
22        file = f"{DEFAULT_CONFIG_FILE_FOLDER}/{DEFAULT_CONFIG_FILE}"
23    else:
24        file = f"{config_file_folder}/{config_file}"
25
26    with open(file) as f:
27        config_json = yaml.safe_load(f)
28        return Config(config_json[FIELD_OPEN_AI_KEY])
29
30
31def init(config_file_folder: str=None, config_file: str=None) -> tuple[Config, asyncio.AbstractEventLoop]:
32    logger.remove()
33    logger.add(sys.stderr, format="{message}", level="INFO")
34    try:
35        cfg = _read_config(config_file_folder, config_file)
36    except:
37        print("No valid configuration file!")
38        cfg = None
39    return (cfg, asyncio.get_event_loop_policy().get_event_loop())
initfunction accepts two argumentsconfig_file_folderandconfig_file. These arguments are passed to make it possible to create tests forconfig.py, because default configs should be stored in the home directory and we don’t have control over it to test it._read_configfunction simply reads the YAML config file and, in case the arguments wereNone, it populates default values.initfunction also configures the logger for our application and returns the default event loop, which we will use later.
The file config.py should look like this:
Loading...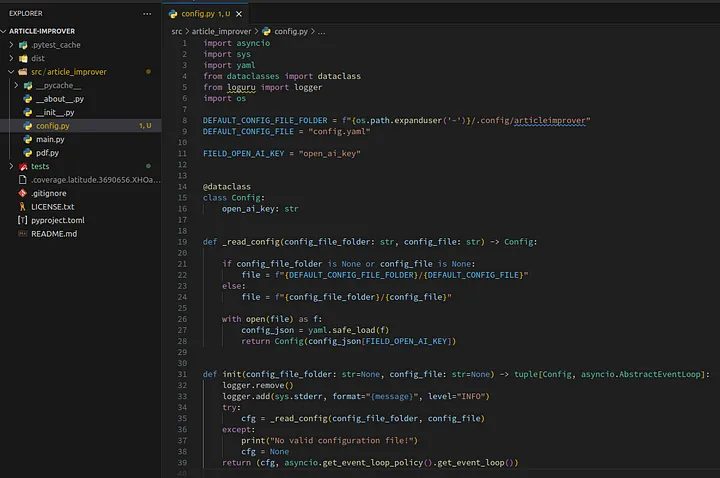
Also, let’s add tests for this file. Create a file test_config.yaml in the package tests with the following content:
1open_ai_key: test-key
The file test_config.yaml should look like this:
Loading...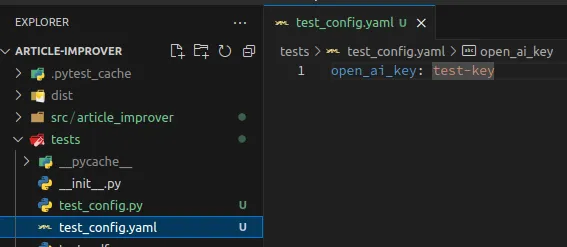
Copy and past test code in the file test_config.py in the package tests:
1from article_improver import config
2from uuid import uuid4
3import os
4
5
6def test_return_config_if_file_exists():
7    # GIVEN
8    folder = "tests"
9    filename = "test_config.yaml"
10    expected_open_ai_key = "test-key"
11
12    # WHEN
13    cfg, loop = config.init(folder, filename)
14
15    # THEN
16    assert loop is not None
17    assert cfg is not None
18    assert cfg.open_ai_key == expected_open_ai_key
19
20def test_return_none_if_file_not_exists():
21    # GIVEN
22    folder = str(uuid4())
23    filename = f"{str(uuid4())}.yaml"
24
25    # WHEN
26    cfg, loop = config.init(folder, filename)
27
28    # THEN
29    assert loop is not None
30    assert cfg is None
31
32def test_default_config_file_folder():
33    # GIVEN
34    expected = f"{os.path.expanduser('~')}/.config/articleimprover"
35
36    # WHEN-THEN
37    assert config.DEFAULT_CONFIG_FILE_FOLDER == expected
38
39def test_default_config_file():
40    # GIVEN
41    expected = "config.yaml"
42
43    # WHEN-THEN
44    assert config.DEFAULT_CONFIG_FILE == expected
- Here we are testing reading
test_config.yamland checking thatconfig.pycan parse the fields oftest_config.yamlcorrectly. - Additionally, I’m testing default values for the config file and config folder because this is a critical part of
config.py. Usually, constants shouldn’t be tested, but in this case, it’s necessary because we want to be sure that our config will be created in the right folder.
The file test_config.py should look like this:
Loading...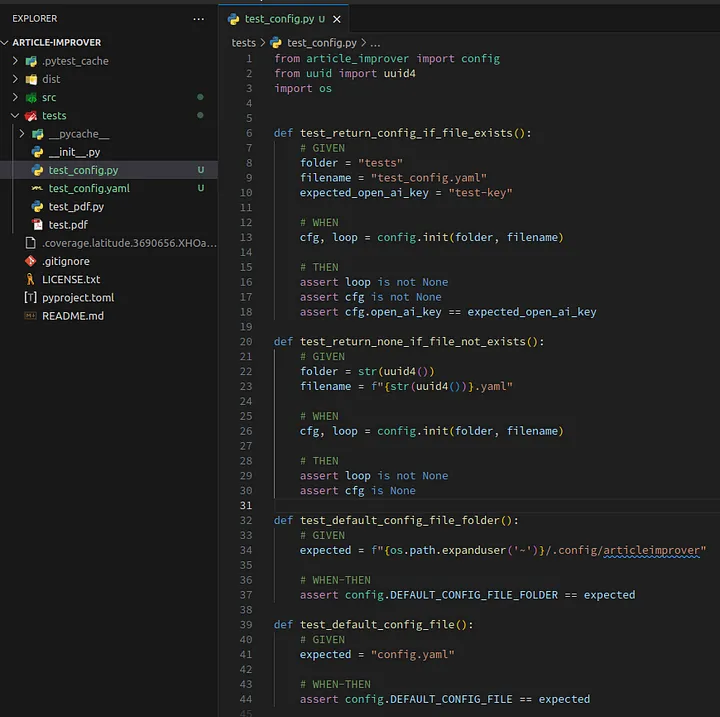
We can launch our tests with the command:
1hatch run test
The result of tests:
Loading...
The content of this section is available on GitHub.
10. Adding Configuration Writer
When our user starts the application for the first time, we need to create a YAML config file with the OpenAI token to have the possibility to execute subsequent user commands. To do this, let’s create a package named command in the package article_improver, as shown in the screenshot below.
Loading...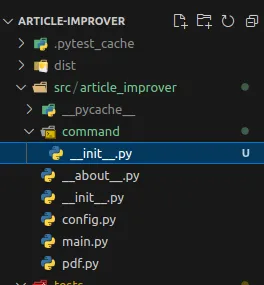
Let’s create a file config_command.py in the newly created package command with the following content:
1from article_improver.config import FIELD_OPEN_AI_KEY
2from pathlib import Path
3import yaml
4
5
6def handle(filename: str, folder: str):
7    print("Generating new config file...")
8    token = input("Please, enter OpenAI token: ")
9    cfg_file = f"{folder}/{filename}"
10    Path(folder).mkdir(parents=True, exist_ok=True)
11    cfg = {FIELD_OPEN_AI_KEY: token}
12    with open(cfg_file, "w") as f:
13        yaml.dump(cfg, f)
14    print(f"New config file has generated: {cfg_file}")
15
handle— is a function which will be called by our user to create a config file.filenameandfolderare arguments which represent the config file location and are needed to create tests for this file.- The function
handlesimply reads user input and writes an OpenAI token to the YAML file.
The file config_command.py should look like this:
Loading...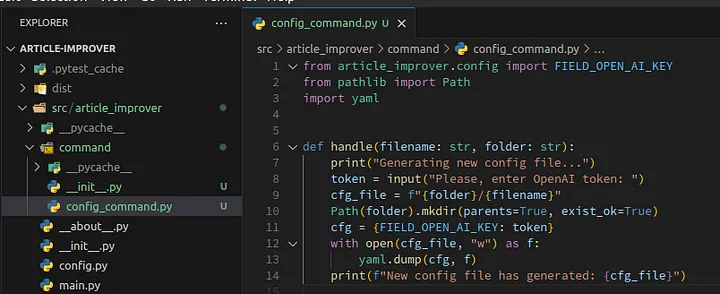
Let’s create tests for this command in the package tests/command:
1import pytest
2import shutil
3import yaml
4from pathlib import Path
5from uuid import uuid4
6from article_improver.command import config_command
7
8
9@pytest.fixture
10def not_exists_folder():
11    folder = str(uuid4())
12    yield folder
13    shutil.rmtree(folder)
14
15
16@pytest.fixture
17def exists_folder():
18    folder = str(uuid4())
19    Path(folder).mkdir(parents=True, exist_ok=True)
20    yield folder
21    shutil.rmtree(folder)
22
23@pytest.fixture(params=["not_exists_folder", "exists_folder"])
24def folder_fixture(request):
25    if request.param == "not_exists_folder":
26        folder = request.getfixturevalue("not_exists_folder")
27    else:
28        folder = request.getfixturevalue("exists_folder")
29    yield folder
30
31@pytest.fixture
32def exists_file(exists_folder):
33    filename = str(uuid4()) + ".yaml"
34    with open(f"{exists_folder}/{filename}", "w") as f:
35        yaml.dump({}, f)
36
37    yield filename
38    Path(f"{exists_folder}/{filename}").unlink(missing_ok=True)
39
40def test_create_file_if_folder_not_exists(monkeypatch, folder_fixture):
41    # GIVEN
42    filename = str(uuid4()) + ".yaml"
43    token = str(uuid4())
44    expected_file = f"{folder_fixture}/{filename}"
45
46    monkeypatch.setattr('builtins.input', lambda _: token)
47
48    # WHEN
49    config_command.handle(filename, folder_fixture)
50
51    # THEN
52    assert Path(expected_file).exists()
53
54    with open(expected_file) as f:
55        config_json = yaml.safe_load(f)
56        assert config_json["open_ai_key"] == token
57
58def test_rewrite_file_if_file_exists(monkeypatch, exists_file, exists_folder):
59    # GIVEN
60    token = str(uuid4())
61    expected_file = f"{exists_folder}/{exists_file}"
62
63    monkeypatch.setattr('builtins.input', lambda _: token)
64
65    # WHEN
66    config_command.handle(exists_file, exists_folder)
67
68    # THEN
69    assert Path(expected_file).exists()
70
71    with open(expected_file) as f:
72        config_json = yaml.safe_load(f)
73        assert config_json["open_ai_key"] == token
74
It should look like this:
Loading...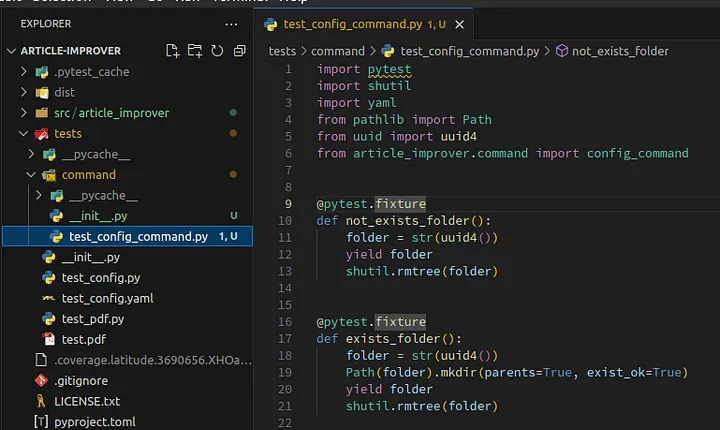
test_create_file_if_folder_not_exists— test a config file creation if the folder exists or not.test_rewrite_file_if_file_exists— test rewriting of the configuration file in case if file exists before.not_exists_folder— fixture for the randomly generated folder name, which removes folder after tests.exists_folder— fixture for randomly generated folder name and created folder with that name, which removes folder after tests.folder_fixture— parametrized fixture which makes it possible to use a couple of fixtures as one test parameter, sotest_create_file_if_folder_not_existswill be called fornot_exists_folderand next forexists_folderfixtures. Without this parametrized fixture I would need to create two tests instead of one.exists_file— fixture which creates a test config file.
Let’s launch tests with the command hatch run test. The result should be as shown in the screenshot below.
Loading...
The content of this section is available on GitHub.
11. Using Configuration Writer
In the previous section, we added config_command, but we didn’t use it. Let’s use it by replacing main.py with the following content:
1import typer
2from article_improver import config
3from article_improver.command import config_command
4
5cfg, loop = config.init()
6app = typer.Typer()
7
8@app.command(name="seo")
9def seo_command():
10    print("Seo command")
11
12@app.command(name="configure")
13def configure_command():
14    config_command.handle(config.DEFAULT_CONFIG_FILE, config.DEFAULT_CONFIG_FILE_FOLDER)
15
16if __name__ == "__main__":
17    app()
configure_command— a new command which will rewrite a config file.cfg, loop = config.init()— initialize config for our application, we will use it later.
Let’s test these changes with the command:
1hatch run article-improver configure
It should ask the user to enter the OpenAI token.
Loading...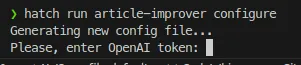
After entering a test token — it will save the configuration file.
Loading...
Let’s inspect our file by copying the file path from the application output and using cat(your path will be another because you have another username).
1cat /home/vitalii/.config/articleimprover/config.yaml
The result is shown in the screenshot below:
Loading...
The content of this section is available on GitHub.
12. Adding ChatGPT
We added the possibility to read the OpenAI token for ChatGPT, so let’s add code which will work with ChatGPT.
Create a file named chat_gpt.py in the module article_improver with the following content:
1import tiktoken
2from openai import AsyncOpenAI
3from loguru import logger
4import json
5
6
7MODEL_GPT_4 = "gpt-4-turbo-preview"
8MODEL_GPT_3 = "gpt-3.5-turbo"
9
10MAX_TOKENS = {MODEL_GPT_3: 4096, MODEL_GPT_4: 128000}
11
12
13class ChatGpt:
14    def __init__(self, client: AsyncOpenAI, temperature: float = 0.5):
15        self.client = client
16        self.temperature = temperature
17
18    async def get_completion(self, prompt: str, content: str, model: str) -> str:
19        try:
20            messages = self.create_messages(prompt, content, model)
21
22            response = await self.client.chat.completions.create(
23                model=model,
24                messages=messages,
25                temperature=self.temperature,
26                response_format={"type": "json_object"},
27            )
28            return response.choices[0].message.content
29        except Exception as e:
30            logger.bind(prompt=prompt, content=content, error=e).error(
31                "can't get ChatGPT response"
32            )
33            raise e
34
35    def create_messages(
36        self, prompt: str, content: str, model: str
37    ) -> list[dict[str, str]]:
38        messages = [
39            {"role": "system", "content": prompt},
40            {"role": "user", "content": "''''''"},
41        ]
42        messages_str = json.dumps(messages)
43        tokenizer = tiktoken.encoding_for_model(model)
44        token_integers = tokenizer.encode(content)
45        remaining = MAX_TOKENS[model] - len(tokenizer.encode(messages_str))
46        user_content = tokenizer.decode(token_integers[:remaining])
47
48        messages[-1]["content"] = f"'''{user_content}'''"
49
50        return messages
51
MODEL_GPT_4— this is the name of the ChatGPT 4 model which we will use to handle our big article.MODEL_GPT_3— this is the name of the ChatGPT 3 model which we will use to fix typos later.ChatGpt— this is a class to work with ChatGPT — it allows users to pass prompts, content, and models without worrying about content length and so on. This class will chunk input and truncate content which is bigger than the model limit.get_completion— this is the main method which the client of this class will call.
The result should look like this:
Loading...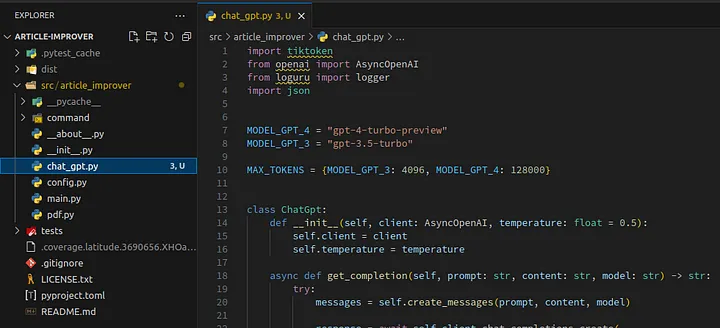
I will omit writing tests for this class to reduce the article size, but you can do it as an additional exercise.
Let’s also update main.py with adding the creation of ChatGpt object. Replace main.py with the following content:
1import typer
2from article_improver import config
3from article_improver.chat_gpt import ChatGpt
4from article_improver.command import config_command
5from openai import AsyncOpenAI
6
7app = typer.Typer()
8cfg, loop = config.init()
9
10if cfg is not None:
11    chat_gpt = ChatGpt(AsyncOpenAI(api_key=cfg.open_ai_key))
12
13@app.command(name="seo")
14def seo_command():
15    print("Seo command")
16
17@app.command(name="configure")
18def configure_command():
19    config_command.handle(config.DEFAULT_CONFIG_FILE, config.DEFAULT_CONFIG_FILE_FOLDER)
20
21if __name__ == "__main__":
22    app()
It should look like this:
Loading...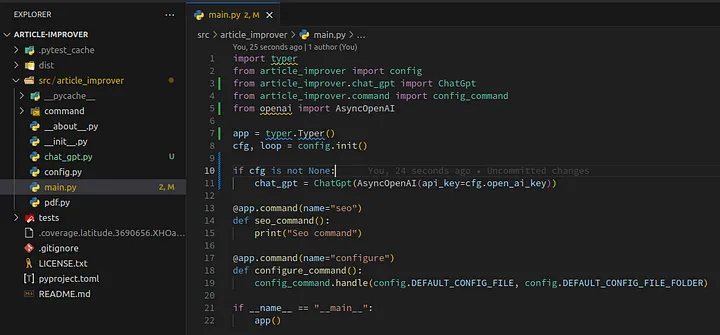
The content of this section is available on GitHub.
13. Adding SEO Handler
Let’s create a file seo.py in the package command as shown in the screenshot below.
Loading...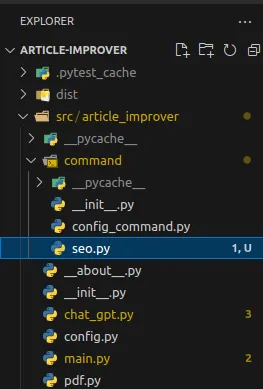
Next, copy and paste the content below into the file seo.py:
1from loguru import logger
2from article_improver.chat_gpt import ChatGpt, MODEL_GPT_4
3from article_improver import pdf
4import json
5import re
6
7FIELD_SEO_OPTIMIZED_TITLES = "seo_optimized_titles"
8FIELD_RATING = "rating"
9FIELD_INCORRECT = "incorrect"
10FIELD_STRONG_SIDES = "strong_sides"
11FIELD_WEAK_SIDES = "weak_sides"
12FIELD_IMPROVEMENTS = "improvements"
13
14PROMPT = f"""
15As an SEO optimization assistant, your task is to evaluate an article provided within triple quotes. Analyze the technical accuracy of the content and its alignment with SEO best practices. Your analysis should culminate in the provision of:
16
171. Three SEO-optimized titles for the article, crafted to improve search engine visibility and attract more readers.
182. A numerical rating for the overall quality of the article on a scale from 1 to 10, considering factors such as relevance, readability, and SEO optimization.
193. Identification of the article's strengths and weaknesses, specifically highlighting three areas where the article excels and three aspects that need improvement.
20
21Please format your response as a JSON object with the following fields:
22- "{FIELD_SEO_OPTIMIZED_TITLES}": An array of strings containing three suggested titles. Example: ["SEO Optimized Title 1", "SEO Optimized Title 2", "SEO Optimized Title 3"].
23- "{FIELD_RATING}": A string indicating the article's quality rating. Example: "7/10".
24- "{FIELD_INCORRECT}": An array of strings listing any inaccuracies or technical errors found in the article. Example: ["Error 1", "Error 2", "Error 3"].
25- "{FIELD_STRONG_SIDES}": An array of strings outlining the article's three main strengths. Example: ["Strength 1", "Strength 2", "Strength 3"].
26- "{FIELD_WEAK_SIDES}": An array of strings detailing the article's three main weaknesses. Example: ["Weakness 1", "Weakness 2", "Weakness 3"].
27- "{FIELD_IMPROVEMENTS}": An array of strings detailing the article's three points of improvements proposed by you. Example: ["Improvement 1", "Improvement 2", "Improvement 3"].
28Ensure the response excludes extraneous formatting or labels, presenting only the JSON object for direct usability in Python.
29"""
30
31UNWANTED_SYMBOLS = [
32    "\u2014",
33    "\u2013",
34    "\u2012",
35    "\u2010",
36    "\u2022",
37    "\u2026",
38    "\u00A0",
39    "\u201C",
40    "\u201D",
41    "\u2018",
42    "\u2019",
43    "\u2122",
44    "\u00AE",
45    "\u00A9",
46    "\u200a",
47    "http:",
48    "https:",
49    "\n",
50    "\t",
51]
52
53
54def print_field(msg: str, field: str, response: dict[str, str]):
55    if len(response[field]) > 0:
56        logger.info(msg)
57        for i, value in enumerate(response[field]):
58            logger.info(f"  {i + 1}. {value}")
59
60
61def compress(content: str) -> str:
62    for char in UNWANTED_SYMBOLS:
63        content = content.replace(char, "")
64    return re.sub(r"[^a-zA-Z0-9\s,.!?;:']", "", content)
65
66
67async def handle(chat_gpt: ChatGpt, filename: str):
68    content = compress(pdf.read_pdf(filename))
69    completion = await chat_gpt.get_completion(PROMPT, content, MODEL_GPT_4)
70    logger.bind(completion=completion).info("response from chat gpt")
71
72    completion_json = json.loads(completion)
73
74    print_field("SEO optimized titles:", FIELD_SEO_OPTIMIZED_TITLES, completion_json)
75    logger.info(f"Rating: {completion_json[FIELD_RATING]}")
76    print_field("Incorrect sides:", FIELD_INCORRECT, completion_json)
77    print_field("Strong sides:", FIELD_STRONG_SIDES, completion_json)
78    print_field("Weak sides:", FIELD_WEAK_SIDES, completion_json)
79    print_field("Improvements:", FIELD_IMPROVEMENTS, completion_json)
FIELD_*— this is the name of the JSON object which ChatGPT will return as the result.PROMPT— this is our prompt to generate SEO optimized title and rating for our article.UNWANTED_SYMBOLS— this is Unicode constants which will be removed from text which was read from the PDF file before sending that text to ChatGPT to increase the size of useful content which we can send.print_field— this is a function which just prints ChatGPT results tostdout.compress— this is a function which reduces text size from PDF files.handle— this is a function which will be called by our user.
The file should look like this:
Loading...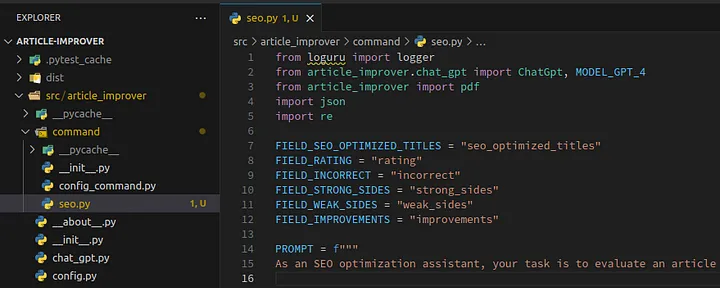
After that, let’s modify main.py to call seo.handle function. Just replace main.py with the following content:
1import typer
2from article_improver import config
3from article_improver.chat_gpt import ChatGpt
4from article_improver.command import config_command, seo
5from openai import AsyncOpenAI
6from rich.progress import Progress, SpinnerColumn, TextColumn
7
8app = typer.Typer()
9cfg, loop = config.init()
10
11if cfg is not None:
12    chat_gpt = ChatGpt(AsyncOpenAI(api_key=cfg.open_ai_key))
13
14def execute_chat_gpt_command(description, fn):
15    if cfg is None:
16        configure_command()
17        print("Run command again")
18    else:
19        with Progress(
20            SpinnerColumn(),
21            TextColumn("[progress.description]{task.description}"),
22            transient=True,
23        ) as progress:
24            progress.add_task(description=description, total=None)
25            loop.run_until_complete(fn())
26
27
28@app.command(name="seo")
29def seo_command(filename: str):
30    async def cmd():
31        await seo.handle(chat_gpt, filename)
32
33    execute_chat_gpt_command("Generating seo recommendations...", cmd)
34
35@app.command(name="configure")
36def configure_command():
37    config_command.handle(config.DEFAULT_CONFIG_FILE, config.DEFAULT_CONFIG_FILE_FOLDER)
38
39if __name__ == "__main__":
40    app()
It should look like this:
Loading...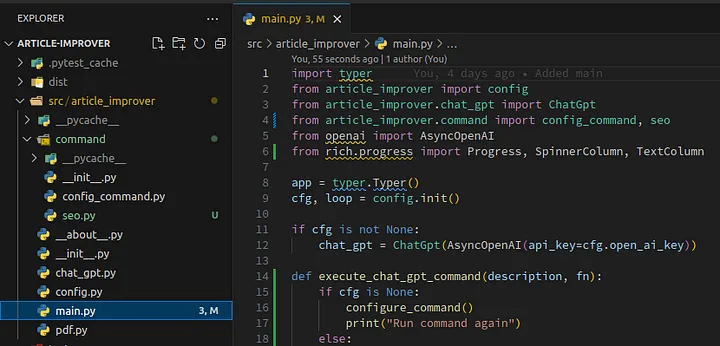
Also, before launching this new command, let’s save a file named sample.pdf in the root of our repository. The file is available on GitHub. The project should look like the screenshot below:
Loading...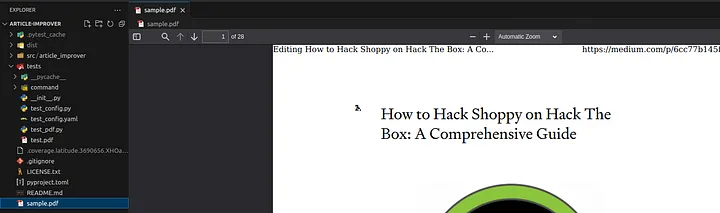
Let’s launch our application with the command:
1hatch run article-improver seo sample.pdf
Unfortunately, an error happens as shown in the screenshot below.
Loading...
The problem is in the OpenAI token — we didn’t configure it right. We will do it in the next section.
Meanwhile, the content of this section is available on GitHub.
14. Adding OpenAI Key
Let’s open the OpenAI website — https://platform.openai.com/apps
Loading...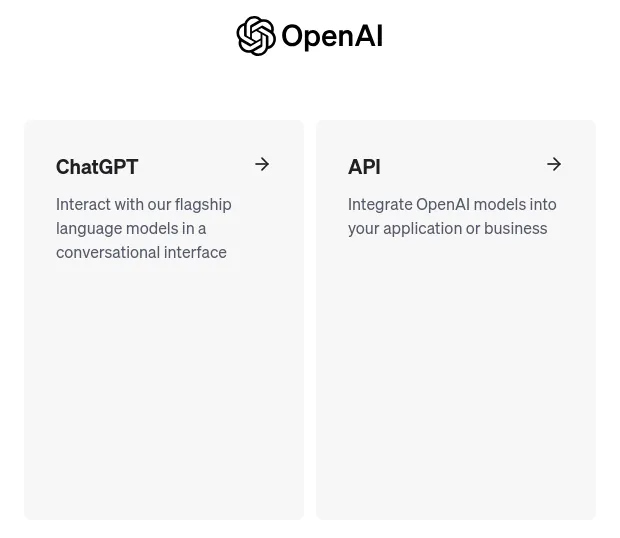
Click on the API. Next, you will see their API page.
Loading...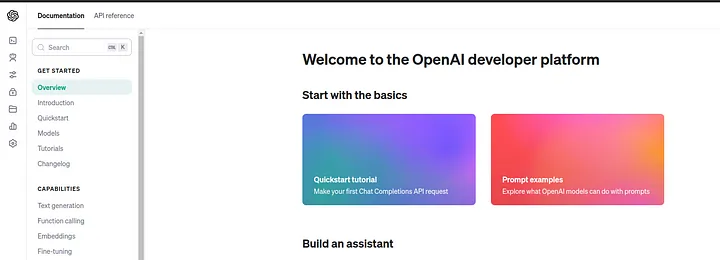
On the side menu, click on the API keys as shown in the screenshot below:
Loading...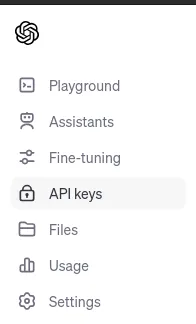
Click on the Create new secret key button:
Loading...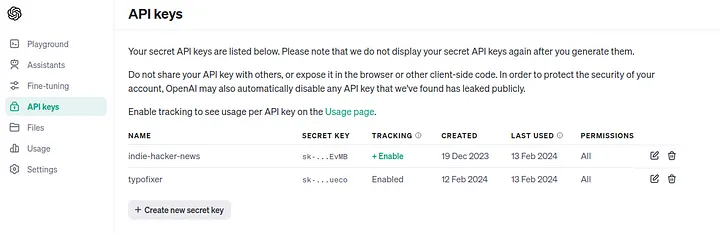 Enter any name, for example
 article-improver and click on Create scret key button:
Loading...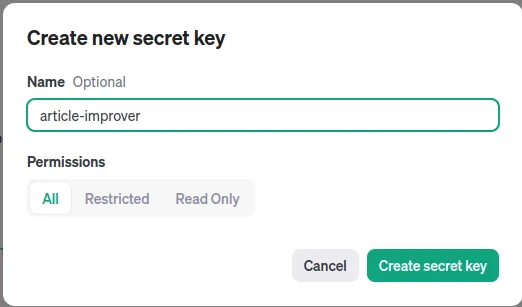
After that just copy your key as shown in the screenshot below (I revoked my key from the screenshot).
Loading...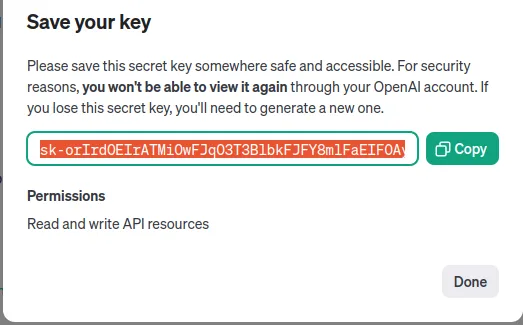
Next, let's run the command:
1hatch run article-improver configure
And paste the copied key in the Please enter OpenAI token input as shown in the screenshot below:
Loading...
That’s it, let’s launch article-improver.
15. Launch article-improver
Launch article-improver with the command:
1hatch run article-improver seo sample.pdf
The result is shown in the screenshot below:
Loading...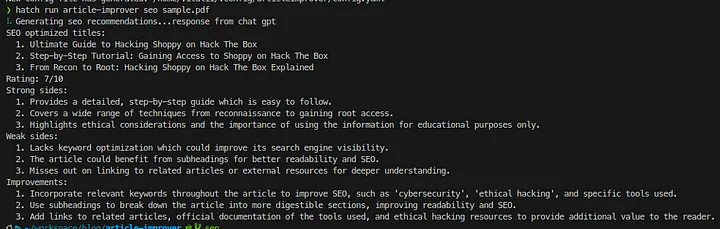
Our application proposes:
- SEO-optimized titles for an article in a PDF file.
- Strong and weak sides of the article.
- Improvements for an article.
The full content of this article is available on the GitHub.
16. Fix code style
In our project, we had a lot of code style issues and to fix them we used the Black code formatter which we installed as an optional dependency.
Let’s launch with a command:
1black .
The result of command execution will be a list of fixed files.
Loading...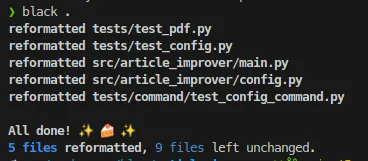
You can commit them and push them to your repository.
17. Install article-improver
Let’s install article-improver to have it as a common CLI tool like cat or curl with the command:
1pip install -e .
Loading...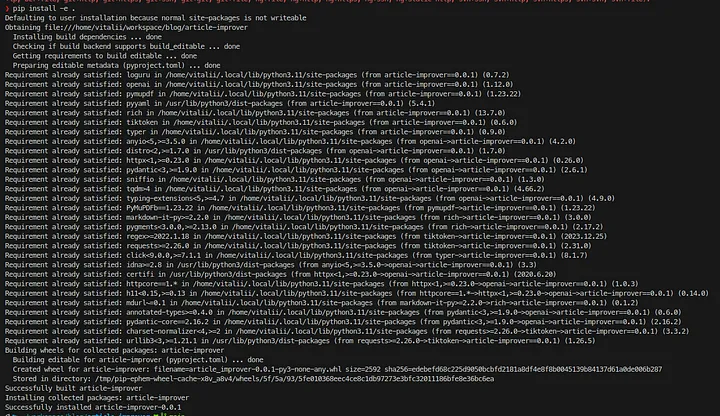
After this command execution, we can open any terminal and launch our article-improver and we don’t need to use hatch anymore, after article-improver installation.
Loading...
Also, make sure that the $PATH was configured properly and you added the path to the Python packages installation folder.
Conclusions
In this article, I provided a tutorial about creating a Python CLI application with ChatGPT. I also explained how to write unit tests for this application and how to configure a Python project with the Hatch project manager. We created an application which improves SEO for Medium articles. In the next article, I will explain how to add a new feature to this application — “fix typos in an article”.
Loading...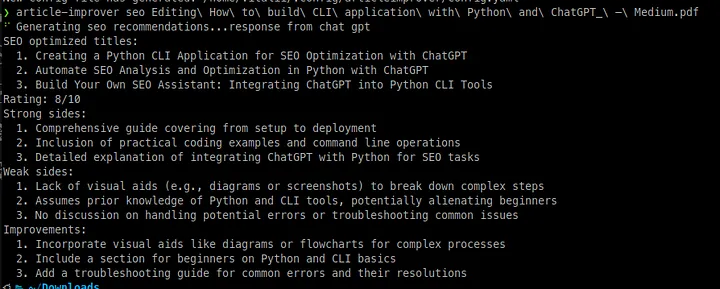
📧 Stay Updated
Get weekly insights on backend development, architecture patterns, and startup building directly in your inbox.
Free • No spam • Unsubscribe anytime
Share this article
Related articles
LLM Prompt Evaluation with Python: A Practical Guide to Automated Testing
Learn how to evaluate LLM prompt quality using Python with practical examples from an open-source AI product research project. Discover automated testing techniques to ensure consistent, high-quality outputs from your AI applications while minimizing costs.
How I Built an AI-Powered YouTube Shorts Generator: From Long Videos to Viral Content
Complete technical guide to building an automated YouTube Shorts creator using Python, OpenAI Whisper, GPT-4, and ffmpeg. Includes full source code, architecture patterns, and performance optimizations for content creators and developers.
